Appearance
Waitlist
WebWorkstationWhen a time slot is fully booked, the waitlist lets staff record interested customers and notify them if a spot opens up.
Current Navigation
The main ZynoSales > Bookings screen currently shows Calendar and List. If your organization uses waitlist workflows, use the Waitlist link provided by your administrator or support team.
How the Waitlist Works
- A customer wants to book a time slot that is full.
- Staff (or the customer, if online booking is enabled) adds them to the waitlist for that slot.
- Staff can select Notify on a waiting entry and set Offer Expires At.
- The entry moves to Notified until it is converted, expired, or cancelled.
Adding Someone to the Waitlist
To add a waitlist entry, you need:
- Activity and Time Slot — Which activity and time slot the customer wants.
- Product — The specific service they are interested in. This is important because different products may consume different amounts of capacity.
- Customer Information — Name, email, and optionally phone number. If the customer is already in Customers & Contacts, an internal customer ID can be recorded when needed.
- Quantity — How many spots they need.
- Duration (for variable-duration activities) — Which session length they want.
- Preferred Resource (optional) — If the customer wants a specific resource, such as a stylist or lane, you can record that preference when you know the resource ID.
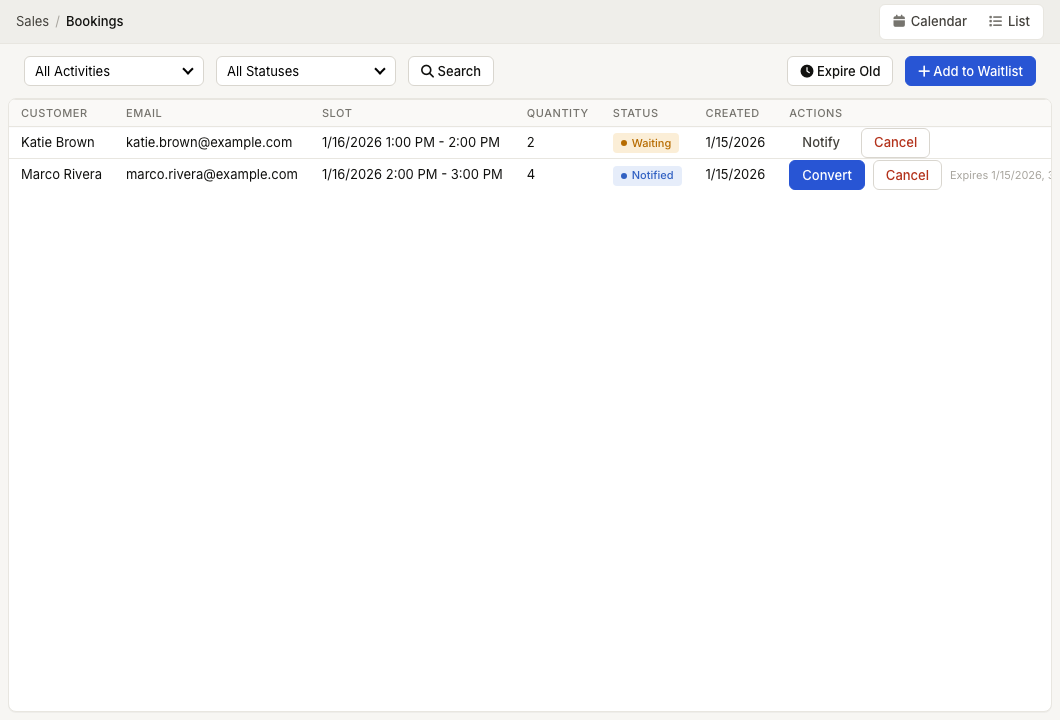
Waitlist Screen
The Waitlist screen includes:
- All Activities and All Statuses filters.
- Search to reload the matching entries.
- Expire Old to expire stale entries.
- Add to Waitlist to create a new entry.
The table shows Customer, Email, Slot, Quantity, Status, Created, and Actions.
Waitlist Statuses
Each waitlist entry moves through these statuses:
- Waiting — The entry is active and waiting for a spot to open.
- Notified — A spot has opened and the customer has been notified. They have a limited time to respond.
- Converted — The customer confirmed and their waitlist entry has been converted into an actual booking.
- Expired — The customer did not respond within the notification window, or the waitlist entry has exceeded its maximum age. The spot is offered to the next person.
- Cancelled — The customer or staff cancelled the waitlist entry.
Notify A Waitlist Entry
For entries in Waiting status, select Notify. ZynoSuite opens Notify Waitlist Entry, where you set Offer Expires At and select Send Notification.
Use this when you want to proactively offer a spot to a specific customer.
Converting a Waitlist Entry to a Booking
When a notified customer is ready to confirm, select Convert. The current conversion prompt asks for the tab item ID to link to the waitlist entry, so this workflow is best handled by staff who understand the related booking or Salespoint record.
Cancelling a Waitlist Entry
Staff can select Cancel on waiting or notified entries. ZynoSuite asks for confirmation before cancelling the entry.
Duplicate Prevention
The system prevents the same customer from being added to the waitlist for the same time slot more than once. This can be checked by customer record when linked and by email address.
Expiration
Waitlist entries can expire after the offer window or when staff use Expire Old. This prevents stale entries from accumulating. When an entry expires:
- The customer is no longer notified about openings.
- Staff can review the next waiting entry and notify them if appropriate.
TIP
Review your waitlist regularly. Patterns in waitlist demand can help you identify opportunities — if the same time slots always have a waitlist, consider adding capacity (more resources, longer hours) or adjusting pricing to balance demand.